Zoombombing (or Zoom raiding) is an unwanted, disruptive intrusion, generally by Internet trolls and hackers, into a video conference call. This guide includes information on preventing zoombombing, as well as tips on how to respond if a zoombomber does gain entry into your Zoom meeting.
Standard Protections at UMW
UMW IT has put a number of security measures in place in your UMW Zoom account’s default settings. These settings have been chosen to strike a balance between security and ease of access, and will protect you from most instances of potential zoombombing.
By default, all Zoom meetings created by UMW accounts will:
- Require a passcode to join (this passcode is embedded in the Zoom link in most situations, so your students don’t have to enter it manually)
- Have the waiting room enabled
- Limit screen sharing to “Host only”
- Have file transfer disabled
Please note that you have the ability to change all of the above settings, and there are many good reasons to do so. For example, having the Waiting Room enabled requires the instructor to monitor notifications throughout the class to ensure students who lose internet connection can reenter the meeting, so some instructors may wish to disable this feature. Each class is different, so you may need to tweak these settings based on your teaching style and the needs of your students.
Some of these options can be checked or unchecked when creating a meeting. Others can be changed as the default option for your individual account. To check or change the default settings for your account, log in with your UMW NetID and password at UMW’s Zoom Web Portal and click “Settings.”
For assistance with Zoom settings, contact the UMW IT Help Desk.
Enhanced Protection
If you feel that your class is at additional risk of zoombombing (perhaps if it is a very large class, or the topic is controversial), you may want to enable additional protection. Below are a few additional precautions you may chose to put in place for your meetings.
Enable the Waiting Room
Enabling the Waiting Room allows the instructor to see usernames of participants before allowing them entry into the meeting. As mentioned above, the Waiting Room is enabled by default in UMW accounts, but can be disabled to allow better ease of access for your students (and less distraction for the instructor).
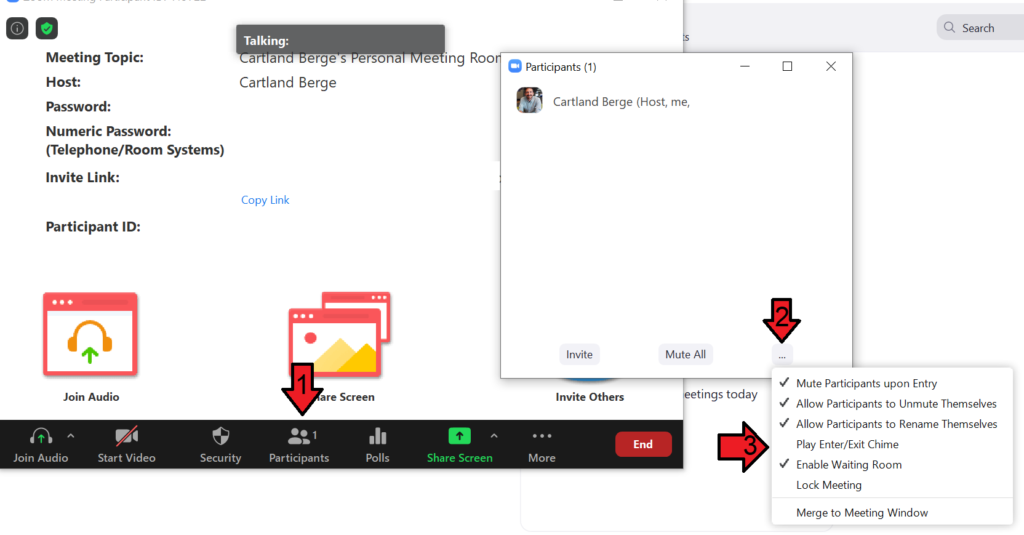
If you decide to have the Waiting Room on, you may also want to enable “Play Enter/Exit Chime” to give an audible notification if a student is disconnected and needs to reenter the meeting. This can be enabled from within a meeting via the “…” button in the Participants sidebar.
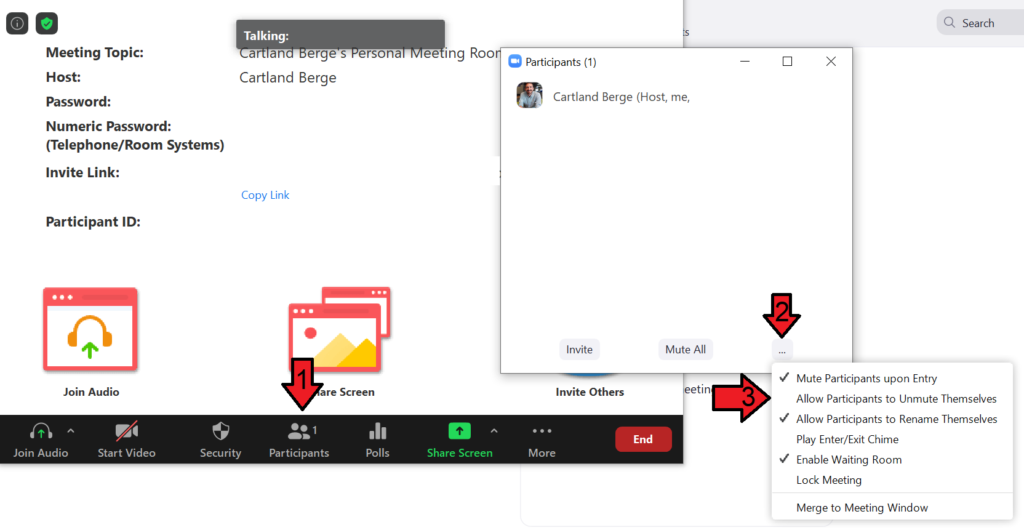
Disable “Allow Participants to Unmute Themselves”
You may want to control who can unmute their mics during a meeting, particularly if you have a very large meeting. This can be enabled from within a meeting via the “…” button in the Participants sidebar:
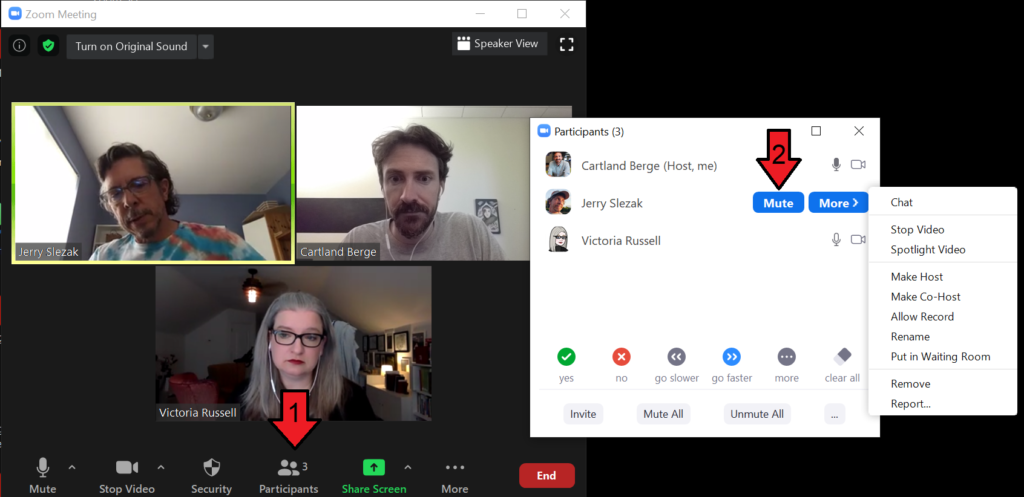
If you select this option, you will need to unmute your students individually to allow them to speak. You can do this by clicking the “Mute/Unmute” button next to the appropriate student in the Participants sidebar.
Note that clicking “Unmute” here does not automatically unmute the participant, but instead allows them to unmute themselves. They will still need to click “Unmute” on their own audio in order to speak.
Disable Chat
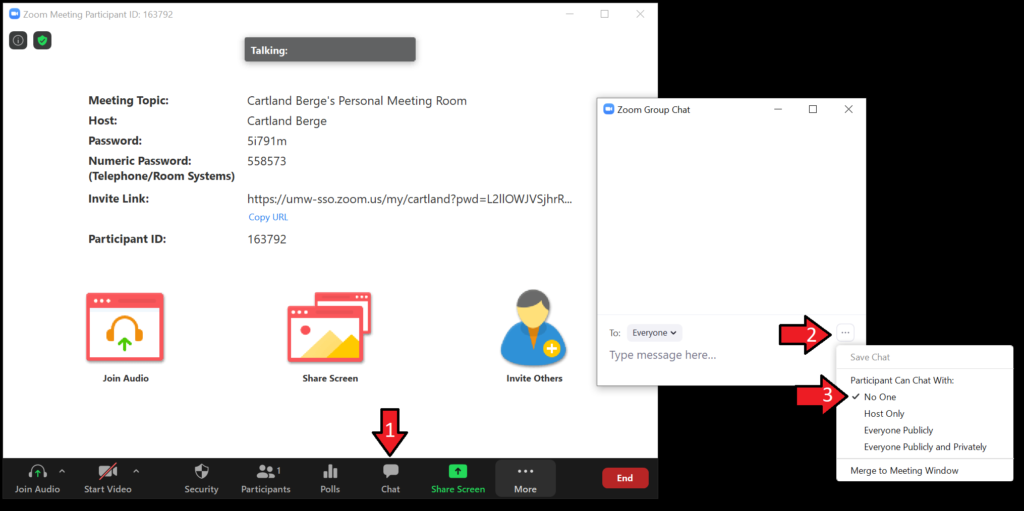
If you have a particularly large class, or you are worried about participants sharing inappropriate content in the chat, you may want to disable the chat feature. You can do this from the “…” button in the Chat sidebar.
If you want participants to only be able to chat to you, select “Host Only.” This can be useful as an avenue for students to alert you of technical difficulties or other issues.
If you want to disable the chat feature completely, select “No One.” You will still be able to send messages to the chat that your students can see, but no one else will be able to post messages.
Require Sign-In with a UMW Account
Note: While all other settings mentioned in this guide can be enabled during a Zoom meeting, this feature must be enabled in advance when creating a meeting.
This setting will require all participants to be signed into a UMW Zoom account in order to join the meeting. While this can make your meetings extremely secure, keep in mind that many students may not have set up their UMW Zoom account, since most meetings can be accessed without signing in. If you enable this option, you will need to make sure all your students have created an account by signing in with their UMW NetID and password at the UMW Zoom Web Portal.
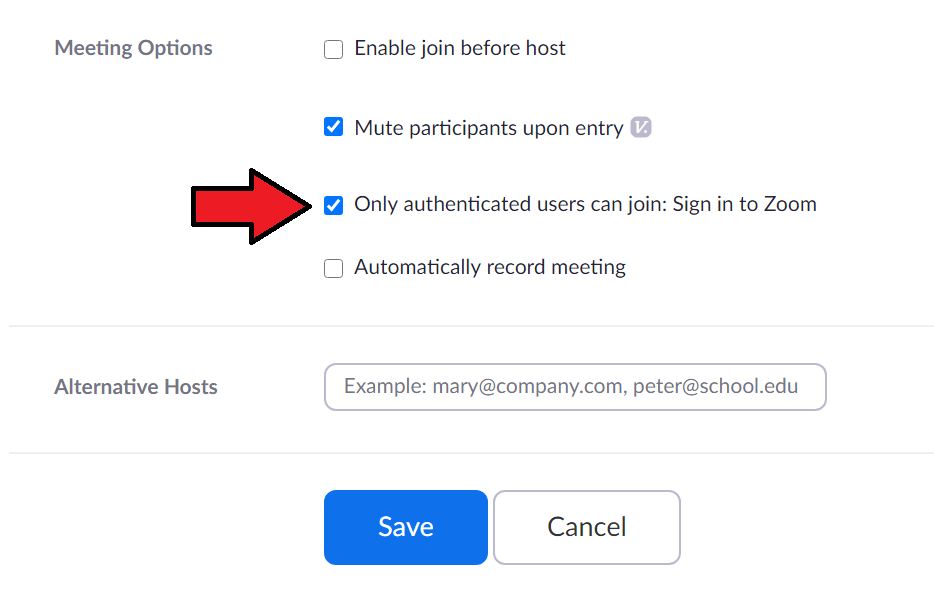
This feature must be turned on when you create your meeting. Click “Only authenticated users can join” under meeting options before saving your meeting.
Note that if you are inviting guest speakers or other participants from outside UMW, you will need to disable this feature to allow them entry.
Responding to a Zoombomb
No matter what precautions you take, there is always a chance that a zoombomber will gain access to your meeting. If this happens, below are a few ways to respond.
Mute All
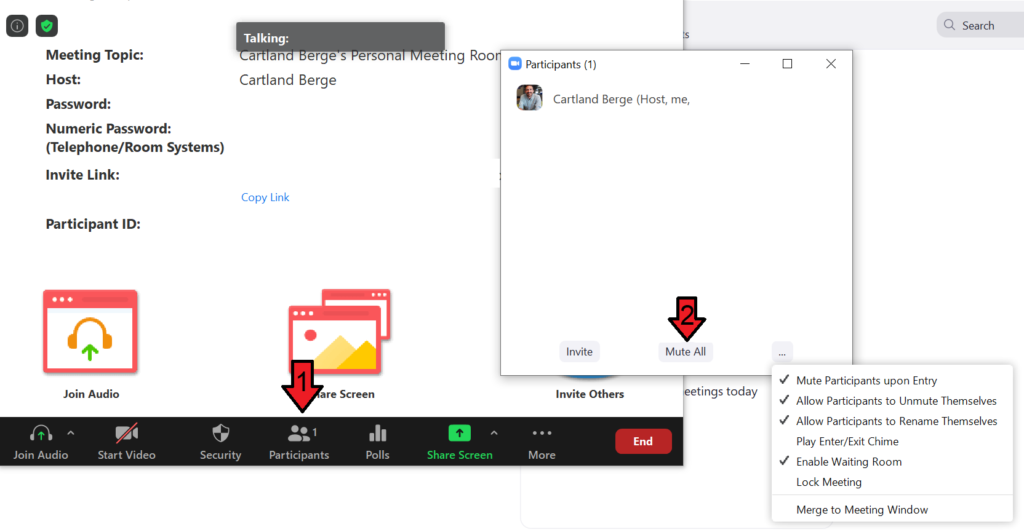
When a zoombomber is disrupting your class, it may be difficult to quickly identify which participant is the cause of the disruption. In this case, the quickest response is to mute all participants. This can be done by clicking the “Mute All” button in the Participants sidebar. Once you do this, you should also disable “Allow Participants to Unmute Themselves” as noted above.
Removing Participants
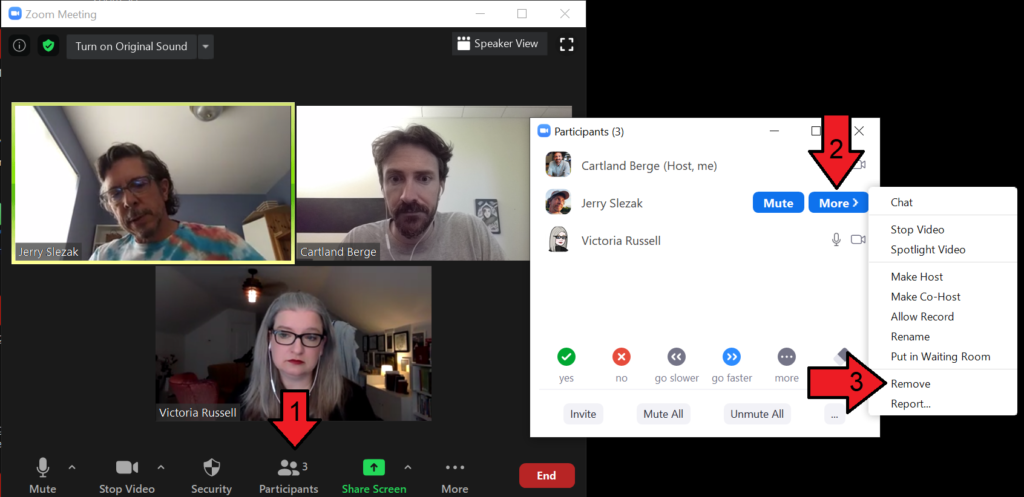
Once you have identified the source of the disruption, you will want to remove the zoombomber. You can do this in the Participants sidebar by clicking “More,” then “Remove.” Removed participants cannot return to the meeting, but the zoombomber may be able to return by signing in with a different account. See “Locking the Meeting” to prevent this.
You can also send a participant to the Waiting Room from this window if you prefer.
Locking the Meeting
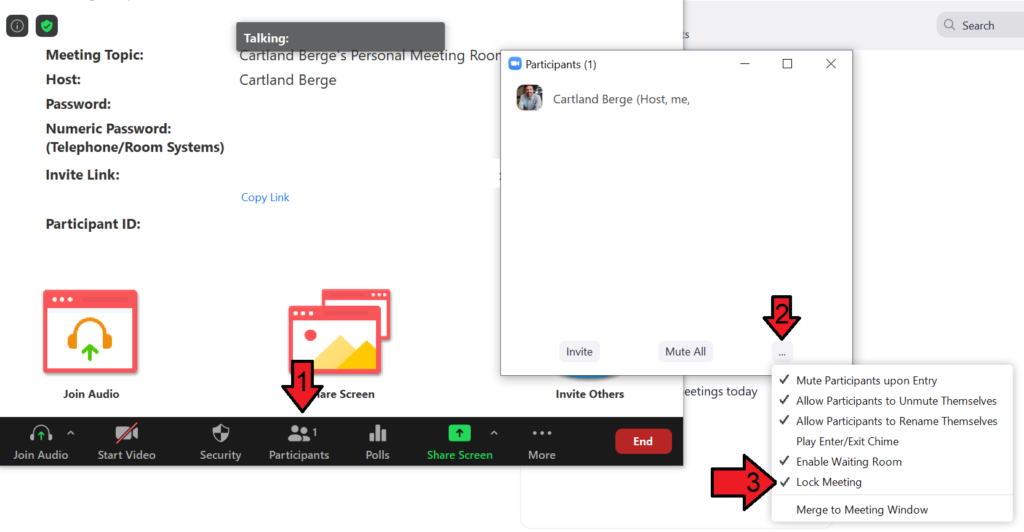
If your meeting’s security is compromised, the best thing to do is lock the meeting. This will block any new participants from joining the meeting. Note that if one of your students gets disconnected, you will need to unlock the meeting to allow them to rejoin (which is why this may not be the best choice for day-to-day class use).
You can lock the meeting from the “…” button in the Participants sidebar.
